Wednesday, March 31, 2021

Difference Between Structured Programming and Object Oriented Programming

Structured Programming, Object Oriented Programming, Oracle Java Exam Prep, Oracle Java Preparation, Oracle Java Guides

Structured Programming vs Object Oriented Programming

Object Oriented Programming (OOP) and Structured Programming are two programming paradigms. A programming paradigm is a fundamental style of computer programming. Programming paradigms differ in how each element of the programs is represented and how steps are defined for solving problems. As the name suggests, OOP focuses on representing problems using real-world objects and their behavior, while Structured Programming deals with organizing the program in a logical structure.

What is Structured Programming?

It is assumed that the birth year of Structured Programming is 1970. Structured programming is considered a subset of imperative programming. A structured program is made up of simple program flow structures, which are hierarchically organized. They are sequence, selection and repetition. Sequence is an order of statements. Selection means selecting a statement from a set of statements based on the current state of the program (for e.g. using if statements) and repetition means executing a statement until a certain state is reached (for e.g. using for or while statements). ALGOL, Pascal, Ada and PL/I are some of the structured programming languages used today.

What is Object Oriented Programming?

In OOP, the focus is on thinking about the problem to be solved in terms of real-world elements and representing the problem in terms of objects and their behavior. Classes depict the abstract representations of real world objects. Classes are like blueprints or templates, which gather similar items or things that can be grouped together. Classes have properties called attributes. Attributes are implemented as global and instance variables. Methods in the classes represent or define the behavior of these classes. Methods and attributes of classes are called the members of the class. An instance of a class is called an object. Therefore, an object is a data structure that closely resembles some real-world object.

There are several important OOP concepts such as Data abstraction, Encapsulation, Polymorphism, Messaging, Modularity and Inheritance. Typically, encapsulation is achieved by making the attributes private, while creating public methods that can be used to access those attributes. Inheritance allows the user to extend classes (called sub classes) from other classes (called super classes). Polymorphism allows the programmer to substitute an object of a class in place of an object of its super class. Typically, the nouns found in the problem definition directly become classes in the program. And similarly, verbs become methods. Some of the most popular OOP languages are Java and C#.

What is the difference between Structured Programming and Object Oriented Programming?

The key difference between Structured Programming and OOP is that the focus of Structured Programming is to structure the program in to a hierarchy of subprograms while, the focus of OOP is to break down the programming task in to objects, which encapsulate data and methods. OOP is considered more flexible than structured programming, because OOP separates a program in to a network of subsystems rather than structuring the program in to a hierarchy. Even though structuring provides certain clarity, a small change to a very large structured program may cause a ripple effect of having to change multiple subprograms.

Monday, March 29, 2021

Difference Between J2SE and J2EE

J2SE vs J2EE

Java is one of the most widely used object oriented programming languages, which is used from software development to web development today. It is a general purpose and concurrent programming language. It was originally developed by Sun Microsystems in 1995. James Gosling is the father of the Java programming language. Oracle Corporation now owns Java (after buying Sun Microsystems recently). Java is a strongly typed language that supports a range of platforms from Windows to UNIX. Java is licensed under GNU General Public License. Since it initial release in 1995 (Java 1.0) it has grown and become the dominant development language for developing web-based applications. J2SE is the Java 2 Platform Standard Edition, which provides the set of basic classes and APIs. Java 6 is its current stable release. J2EE is Java 2 Platform Enterprise Edition, which provides advanced technologies and APIs built on top of the functionality provided by J2SE. Developers of Java changed names of all the editions recently, and now J2SE and J2EE are known as Java SE and Java EE respectively.

What is J2SE?

Core Java, Oracle Java Tutorial and Material, Oracle Java Certification, Oracle Java Prep

J2SE is a collection of basic Java classes and APIs. Its latest version Java 6 (also known as Java Standard Edition 6.0 or Java SE 6 or Java 1.6), codenamed Mustang, was released in December, 2006. Current revision is the Update 26, which was released on June, 2011. It has 3700+ classes and interfaces. It focuses on new specifications and APIs including XML, Web Services, JDBC version 4.0, programming based on Annotations, API’s for Java compiler and Application client GUI. This was on top of already existing features like Annotations, Generics and Autoboxing. Annotations are a mechanism for tagging classes with metadata so that they can be used by metadata-aware programs. Generics is a mechanism of specifying types for objects belonging to collections such as Arraylists, so that type safety is guaranteed at compile time. Autoboxing allows the automatic conversions between primitive types (e.g. int) and wrapper types (e.g. Integer). Also, the support for older versions of Windows (Win9x series) was removed starting from the Update 7.

What is J2EE?

Core Java, Oracle Java Tutorial and Material, Oracle Java Certification, Oracle Java Prep

J2EE provides a server programming platform in Java. J2EE adds functionality (libraries) for the deployment of distributed and multi-tier java applications running on application servers. Current version of J2EE is Java EE 6. JDBC (Java Database Connectivity), RMI (Remote Method Invocation), JMS (Java Message Service), web services and XML are some of the specifications offered by Java EE. Furthermore, specifications unique to Java EE such as Enterprise JavaBeans (EJB), Connecters, Servlets, portlets, Java Server Pages (JSP) are also offered. The aim of this is to allow programmers to develop application with high scalability and portability. Java EE developers can focus on business logic (instead of infrastructure/integration) because the application servers will take care of transactions, security and concurrency.

What is the difference between J2SE and J2EE?

J2SE is a collection of base classes and APIs that provides basic functionality (Java language, virtual machine and base libraries) for developing standard Java applications, while J2EE offers a collection of technologies and APIs for developing multi-tier enterprise applications. In other words, J2SE is used for developing applications that execute as standalone desktop programs or applets, but J2EE is typically used for writing applications that execute inside a J2EE container. J2EE has all the functionality of J2SE. But, it has additional functionality such as EJB, JSP, Servelts and XML technology. It also includes tests for checking the compliance of applications with existing applications that support J2EE.

Friday, March 26, 2021

Difference Between JVM and JRE

Oracle JVM, Oracle JRE, Oracle Java Certification, Oracle Java Exam Prep, Oracle Java Preparation

JVM vs JRE

Java is a cross-platform programming language. It also adheres to the “write once, run anywhere” principle. The program written in Java can be compiled in to Java bytecode by the Java compiler. Then, the bytecode can be executed on any platform running the JRE (Java Runtime Environment). JRE includes the JVM (Java Virtual Machine), base libraries (which implements the Java API) and other supporting files. JVM is an abstract computing machine that acts as a mediator between the platforms specific JRE and the Java code.

What is JVM?

JVM is a type of virtual machine that is used by machines to execute Java bytecode. According to Sun Microsystems (who developed Java until it was bought by Oracle, very recently), there are more than 4 billion JVM enabled devices in the world. More specifically, Java Virtual Machine is an abstract computing machine implemented on standard hardware and operating system. One of the important functionality provided by the JVM is automated exception handling. Typically, a collection of standard libraries accompany the JVM. In fact, JRE is a bundle containing the JVM and the classes that implement the Java API. JVM is a very important component, which accommodates the “compile once, run anywhere” nature of the Java programming language. As long as the JVM is running, your Java code can run on top of it, regardless of the platform used in the machine. This is why Java is called a cross-platform or multi-platform language.

Read More: 1Z0-900: Java EE 7 Application Developer

What is JRE?

JRE is the execution environment on which Java code is run. Typically, JRE is composed of the JVM, standard base classes (that implement the base Java API) and other supporting files. Type and structure of JRE vary depending on the operating system and the CPU architecture. When the Java code is run, the JRE will communicate with the operating system, which in turn will talk with the corresponding hardware components. Having JRE installed on your system is a must to run any java code on your machine. However, JRE does not include a compiler, debugger or any other tools needed for the development of Java programs (such as appletviewer and javac). If you need to develop programs in Java, you need to have the JDK (Java Development Kit), which includes the JRE as well.

What is the difference between and JVM and JRE?

Although, in everyday use, the terms JVM and JRE are being used interchangeably, they have their differences. JVM is a virtual machine that runs on top of the operating system, while JRE is the runtime execution environment. JVM is a part of the JRE. JVM specification acts as the link between the platform-specific JRE implementation and the standard Java libraries. Therefore, JVM is the entity that provides the abstraction from the inner implementation details to the programmer. And it is responsible for interpreting the compiled bytecode. However, JVM needs the base libraries and other supporting files to execute the java bytecode. But sometimes, JRE is simply identified as an implementation of JVM.

Wednesday, March 24, 2021

Difference Between Java5 and Java6

Oracle Java 5, Oracle Java 6, Core Java, Oracle Java Learning, Oracle Java Certification

Java5 vs Java6

Java is one of the most widely used object oriented programming languages, which is used from software development to web development today. It is a general purpose and concurrent programming language. It was originally developed by Sun Microsystems in 1995. James Gosling is the father of the Java programming language. Oracle Corporation now owns Java (after buying Sun Microsystems recently). Java is a strongly typed language that supports a range of platforms from Windows to UNIX. Java is licensed under GNU General Public License. Since it initial release in 1995 (Java 1.0), it has grown and has become the dominant development language for developing web-based applications. Java 6 is its current stable release, while Java 5 is the previous version.

Java5

Java 5 (also known as Java Standard Edition 5.0 or J2SE 5 or J2SE 1.5), codenamed Tiger, was released in September, 2004. Java 5 has passed its life span, and the Sun’s support for it expired in November, 2009. It had 3200+ classes and interfaces. Java 5 introduced several major updates, such as language improvements (i.e. Annotations, Generics, Autoboxing, and improved syntax for looping) among many others. Annotation is a mechanism for tagging classes with metadata so that, they can be used by metadata-aware programs. Generics is a mechanism of specifying types for objects belonging to collections, such as Arraylists, so that type safety is guaranteed at compile time. Autoboxing allows the automatic conversions between primitive types (e.g. int) and wrapper types (e.g. Integer). Improved syntax for looping includes the enhancements for each loop for going through the items of array or collections comparatively easily.

Java6

Java 6 (also known as Java Standard Edition 6.0 or Java SE 6 or Java 1.6), codenamed Mustang, was released in December, 2006. Current revision is the Update 26, which was released on June, 2011. It has 3700+ classes and interfaces. It focuses on new specifications and APIs including XML, Web Services, JDBC version 4.0, programming based on Annotations, API’s for Java compiler and Application client GUI. Also, the support for older version of Windows (Win9x series) will be removed starting from the Update 7.

What is the difference between Java5 and Java6?

Java 6 is the current stable version of Java programming language, while Java 5 is its previous version. Java 5 is officially passed its life time, and is not supported by Sun anymore. Although Java 5 added many major changes (like Autobxing) to the language, Java 6 adds further more useful features. Specifically, Unlike with Java 5, which focused on adding/improving language (syntax) features, Java 6 added broad range of enhancements to the infrastructure of the Java language. Although, Java 5 introduced Annotations, Java 6 came up with additional types of annotations and APIs for processing annotations (e.g. Web services metadata for the Java Platform, Common Annotations for Java Platform, and Pluggable Annotation Processing API).

Thanks to the new compiler API added with Java 6, the java compiler can now receive and/or send output to an abstraction of the file system (programs can specify/process compiler output). Furthermore, Java 6 added enhancements to the applications GUI capabilities in AWT (faster splash screens and support for system tray) and SWING (better drag-and-drop, support for customizing layouts, multithreading enhancements and ability to write GIF images). Furthermore, changes have been added to the specification of the class file including a framework to allow programs to connect to scripting interpreters and backward navigation to collection classes.

Monday, March 22, 2021

Difference Between Java and Oracle

Oracle Java Tutorial and Material, Oracle Java Preparation, Oracle Java Exam Prep, Oracle Java Learning

Java vs Oracle

Oracle database (simply referred to as Oracle) is an Object Relational Database Management System (ORDBMS) that supports a large range of platforms. Oracle DBMS is available in different versions ranging from versions for personal use and enterprise class versions. It is the most widely used database system in the world. Java is one of the most popular object oriented programming languages in the world. Oracle provides a wide range of programming tools and environments. Oracle can be accessed with a variety of programming languages. For example, Java can be used to write programs that communicate with Oracle databases.

What is Java?

Java is one of the most widely used object oriented (and class-based) programming languages today. It is a general purpose and concurrent programming language. It was originally developed by Sun Microsystems in 1995. James Gosling is the father of the Java programming language. Oracle Corporation now owns Java (after buying Sun Microsystems recently). Java Standard Edition 6 is its current stable release. Java is a strongly typed language that supports a range of platforms from Windows to UNIX. Java is licensed under GNU General Public License. Java’s syntax is very much similar to C and C++. Java source files have the .java extension. After compiling Java source files using the javac compiler, it will produce .class files (containing the Java bytecode). This bytecode files can be interpreted using the JVM (Java Virtual Machine). Since JVM can run on any platform, Java is said to be multi-platform (cross-platform) and highly portable.

What is Oracle?

Oracle Java Tutorial and Material, Oracle Java Preparation, Oracle Java Exam Prep, Oracle Java Learning
Oracle is an ORDBMS produced by the Oracle Corporation. Oracle is the most popular database system in the world. It can be used in large enterprise environments as well as for personal use. It runs on all platforms from PC to mainframes. Oracle DBMS is made up of the storage and at least one instance of the application. An instance is made up of processes of operating system and memory structure that work with the storage. In Oracle DBMS, data is accessed using SQL (Structured Query Language). These SQL commands can be embedded in other languages or could be executed directly as scripts. Furthermore, it can execute stored procedures and functions by invoking them using PL/SQL (procedural extension to SQL developed by Oracle Corporation) or other object oriented languages such as Java. Oracle uses a two level mechanism for its storage. First level is a logical storage organized as tablespaces. Tablespaces are made up of memory segments, which in turn are made up more extents. Second level is the physical storage made up of data files.

What is the difference between Java and Oracle?

The Oracle Corporation, who develops the Oracle RDBMS, now owns the Java as well. Oracle is a RDBMS, while Java is a programming language. Therefore Java and Oracle cannot be directly compared. However, JDBC API can be used to write Java applications that can access Oracle databases. Java can be downloaded at no cost, but Oracle is a very expensive commercial product.

Friday, March 19, 2021

Java Classes and Objects

Core Java, Oracle Java Certification, Oracle Java Exam Prep, Oracle Java Preparation, Oracle Java Learning

Java Classes/Objects

Java is an object-oriented programming language.

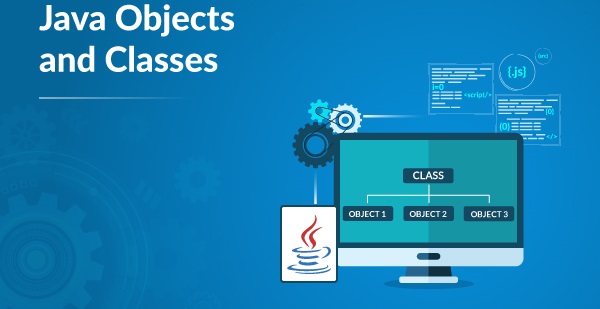
Everything in Java is associated with classes and objects, along with its attributes and methods. For example: in real life, a car is an object. The car has attributes, such as weight and color, and methods, such as drive and brake.

A Class is like an object constructor, or a "blueprint" for creating objects.

Create a Class

To create a class, use the keyword class:

Main.java

Create a class named "Main" with a variable x:

public class Main {

  int x = 5;

}

Create an Object

In Java, an object is created from a class. We have already created the class named MyClass, so now we can use this to create objects.

To create an object of MyClass, specify the class name, followed by the object name, and use the keyword new:

Example

Create an object called "myObj" and print the value of x:

public class Main {

  int x = 5;

  public static void main(String[] args) {

    Main myObj = new Main();

    System.out.println(myObj.x);

  }

}

Multiple Objects

You can create multiple objects of one class:

Example

Create two objects of Main:

public class Main {

  int x = 5;

  public static void main(String[] args) {

    Main myObj1 = new Main();  // Object 1

    Main myObj2 = new Main();  // Object 2

    System.out.println(myObj1.x);

    System.out.println(myObj2.x);

  }

}

Using Multiple Classes

Core Java, Oracle Java Certification, Oracle Java Exam Prep, Oracle Java Preparation, Oracle Java Learning
You can also create an object of a class and access it in another class. This is often used for better organization of classes (one class has all the attributes and methods, while the other class holds the main() method (code to be executed)).

Remember that the name of the java file should match the class name. In this example, we have created two files in the same directory/folder:

◉ Main.java

◉ Second.java

Main.java

public class Main {

  int x = 5;

}

Second.java

class Second {

  public static void main(String[] args) {

    Main myObj = new Main();

    System.out.println(myObj.x);

  }

}

When both files have been compiled:

C:\Users\Your Name>javac Main.java

C:\Users\Your Name>javac Second.java

Run the Second.java file:

C:\Users\Your Name>java Second

And the output will be:

5

Wednesday, March 17, 2021

Sorting HashMap by Value in Java 8 in Ascending and Descending Order

Core Java, Oracle Java Tutorial and Material, Oracle Java Certification, Oracle Java Preparation

A quick guide to sort HashMap by value in java and new java 8 api in ascending or descending order.

1. Overview

Most of the times, we do sort the hashmap based on the keys but not rather than its values. There are some scenarios for example HashMap stores the name as key and age as value. Now, we want to sort the customers based on the their value age.

Let us explore the techniques to do sort the values of hashmap in java 8.

2. Sort HashMap By Value Java 8 – Ascending Order

Below example is to sort the map on values using Stream.sort() and Entry.comparingByValue() methods.

Entry.comparingByValue() does sorting in the ascending order.

Java 8 example:

package com.oraclejavacertified.collections.hashmap;

import java.util.HashMap;

import java.util.LinkedHashMap;

import java.util.Map;

import java.util.Map.Entry;

import java.util.stream.Collectors;

public class SortHashMapByValues {

    public static void main(String[] args) {

        // creating HashMap

        Map<String, Integer> namesAges = new HashMap<>();

        // storing the values

        namesAges.put("Hari", 35);

        namesAges.put("Jhon", 30);

        namesAges.put("Jakey", 50);

        namesAges.put("kane", 45);

        Map<String, Integer> sortByValueMap = namesAges.entrySet().stream().sorted(Entry.comparingByValue())

                .collect(Collectors.toMap(entry -> entry.getKey(), entry -> entry.getValue(),

                        (entry1, entry2) -> entry2, LinkedHashMap::new));

        System.out.println("HashMap before sorting by value - " + namesAges);

        System.out.println("HashMap after sorting by value - " + sortByValueMap);

    }

}

Output:

HashMap before sorting by value - {Hari=35, Jakey=50, Jhon=30, kane=45}

HashMap after sorting by value - {Jhon=30, Hari=35, kane=45, Jakey=50}

From the output, you can observe that new map is sorted based on the customer ages.

If you do not understand this java 8 lambda and stream operations, do not worry. I will explain you step by step and breaking down into separate statements.

Read the written comments for each line in the code and this will help you out for better understanding.

Once you are clear, you can write the code in single line.

package com.oraclejavacertified.collections.hashmap;

import java.util.Comparator;

import java.util.HashMap;

import java.util.LinkedHashMap;

import java.util.Map;

import java.util.Map.Entry;

import java.util.Set;

import java.util.stream.Collector;

import java.util.stream.Collectors;

import java.util.stream.Stream;

public class SortHashMapByValues {

    public static void main(String[] args) {

        // creating HashMap

        Map<String, Integer> namesAges = new HashMap<>();

        // storing the values

        namesAges.put("Hari", 35);

        namesAges.put("Jhon", 30);

        namesAges.put("Jakey", 50);

        namesAges.put("kane", 45);

        // Step 1: Getting the entry set from map

        Set<Map.Entry<String, Integer>> entrySet = namesAges.entrySet();

        // Step 2: converting entry set to stream

        Stream<Entry<String, Integer>> stream = entrySet.stream();

        // Step 3: comparator to sort using values.

        Comparator<Map.Entry<String, Integer>> comparator = Entry.comparingByValue();

        // Step 4: sorting the stream using comparator created in above step.

        Stream<Entry<String, Integer>> sortedStream = stream.sorted(comparator);

        // Step 5: Getting the each key and value from entry object from above stream.

        // Finally, adding each entry to the LinkedHashMap.

        // LinkedHashMap is used to preserve the insertion order. If you do not collect

        // object into LinkedHashMap then final sorted map looks like same as the

        // original map before sorting.

        Collector<Entry<String, Integer>, ?, Map<String, Integer>> toMap = Collectors.toMap(entry -> entry.getKey(),

                entry -> entry.getValue(), (entry1, entry2) -> entry2, LinkedHashMap::new);

        // Step 6: Collecting the sorted stream into Map.

        Map<String, Integer> finalSortedByValueMap = sortedStream.collect(toMap);

        // printing

        System.out.println("HashMap before sorting by value - " + namesAges);

        System.out.println("HashMap after sorting by value - " + finalSortedByValueMap);

    }

}

This program also generates the output as same as above single line stream example.

Note:

When you divide the stream into multiple lines, JVM does not execute the code immediately after executing the each line. All stream operations are invoked if and if only the terminal operations are called such as collect(), max(), min() methods.

3. Sort HashMap By Value Java 8 – Descending Order

Next, Learn how to sort the HashMap by values in Descending order using

Collections.reverseOrder() method.

package com.oraclejavacertified.collections.hashmap;

import java.util.Collections;

import java.util.Comparator;

import java.util.HashMap;

import java.util.LinkedHashMap;

import java.util.Map;

import java.util.Map.Entry;

import java.util.Set;

import java.util.stream.Collector;

import java.util.stream.Collectors;

import java.util.stream.Stream;

public class SortHashMapByValues {

    public static void main(String[] args) {

        // creating HashMap

        Map<String, Integer> namesAges = new HashMap<>();

        // storing the values

        namesAges.put("Hari", 35);

        namesAges.put("Jhon", 30);

        namesAges.put("Jakey", 50);

        namesAges.put("kane", 45);

        Map<String, Integer> sortedMapInDescending = namesAges.entrySet()

            .stream()

            .sorted(Collections.reverseOrder(Entry.comparingByValue()))

            .collect(Collectors.toMap(entry -> entry.getKey(), entry -> entry.getValue(),

                    (entry1, entry2) -> entry2, LinkedHashMap::new));

        // printing

        System.out.println("HashMap before sorting by value - " + namesAges);

        System.out.println("HashMap after sorting by value in descending order- " + sortedMapInDescending);

    }

}

Output:

HashMap before sorting by value - {Hari=35, Jakey=50, Jhon=30, kane=45}
HashMap after sorting by value in descending order- {Jakey=50, kane=45, Hari=35, Jhon=30}

4. HashMap Sorting using Method Reference


Example program using java 8 method ref concept.

// sorting using method ref
// Descending
Map<String, Integer> sortedMapInDescendingOrder = namesAges.entrySet()
.stream()
.sorted(Collections.reverseOrder(Entry.comparingByValue()))
.collect(Collectors.toMap(Map.Entry::getKey, Map.Entry::getValue,
        (entry1, entry2) -> entry2, LinkedHashMap::new));
 
// Ascending
Map<String, Integer> sortedMapIAscendingOrder = namesAges.entrySet()
.stream()
.sorted(Collections.reverseOrder(Entry.comparingByValue()))
.collect(Collectors.toMap(Map.Entry::getKey, Map.Entry::getValue,
    (entry1, entry2) -> entry2, LinkedHashMap::new));

Monday, March 15, 2021

Java 9 Modules: part 1

Java 9 Modules, Core Java, Oracle Java Tutorial and Material, Oracle Java Certification, Oracle Java Preparation, Oracle Java Guides

In this blog we will go through one of the most important features of java 9, which is ‘Modules’ aka ‘Java Platform Module System (JPMS)’. We will understand everything about JPMS like, what is module? How it helps to add modules? and How to create and use module? Even if you don’t know anything about module don’t worry we got it covered.

If you are scared of this new word(‘Modules’), don’t worry once you understand it, it will be very easy.

Difference between JDK8 and JDK9

We all know that JRE is the most important part of JDK. But, since java 9, JDK does not contain the JRE folder. Yes! that is true, because from java 9 JRE is converted to multiple small modules and they are present in folder called ‘jmods’.

We can list system modules or the contents of this ‘jmods’ folder by using the command : java –list-modules.

What is a Java 9 Module?

Module system is a part of Jigsaw Project. It adds one more abstraction level above packages. In other words, it is a ‘package of Packages’ that makes our code even more reusable.

It is also fine to say that a module is a group of closely related packages, resources and module descriptor(module-info.java) file.

In Java 9 ‘java.base’ is a base module. It does not depend on any other modules. By default, all modules including user defined modules are dependent on this module.

Even if we do not specify ‘java.base’ module, it will be imported automatically.

Features of java 9 Modules

◉ Increases code reusability: by creating modules we can use them in different projects

◉ Easy and meaningful grouping of packages: if we have many packages in one project it is difficult to manage and organize code, this is where modules come to the rescue

◉ More abstraction to packages: we can decide which packages are allowed to be accessed outside and which are private or for internal use

◉ Separation of resource: each module will have it’s own required resource files like media or configuration files

◉ Internal or secure classes can be hidden from outside world

Java 9 Modules, Core Java, Oracle Java Tutorial and Material, Oracle Java Certification, Oracle Java Preparation, Oracle Java Guides

Steps to create Module


1. Create a folder with module name. Generally company name in reverse with artifact name is used. eg: ‘com.stacktraceguru.util’
2. Add file with name ‘module-info.java’ in module root folder. This file is called as ‘Module Descriptor’ file
3. Create java packages as per requirement
4. Add classes as required under the created packages

What are the rules for creating Module?


◉ Module name must be unique
◉ Each module must have exactly one Module Descriptor file with name ‘module-info.java’
◉ Package names must be unique. Even in the different modules we cannot have same package names
◉ We can add media and other resource files in the module
◉ Each module will create one jar file. For multiple jars we need to create separate modules
◉ One project can have multiple modules

Note: Module name should not end with digits

What are theModule types?


Depending on how the modules are used, they are categorised into 4 types,

◉ System Modules: the modules from JDK and JRE. Can be listed using java ´–list-modules
◉ Application Modules: all the modules created in an application to achieve a functionality
◉ Automatic Modules: existing jar files which are not modules but are added to module path. When we add non module jars to module path, module with jar name is created.
     ◉ By default exports all the packages
     ◉ By default can access classes from all other modules

◉ Unnamed Module: jars and classes added into the classpath. When we add jar or class to the classpath all these classes are added to the unnamed module
     ◉ Only exports to other unnamed module and automatic module. This means, application modules cannot access these classes
     ◉ It can access classes from all the modules

What is Module Descriptor file?


It is a file with name module-info.java, under the root module path. This file contains the module metadata information.

This is also java file which is compileable using javac command.

This file defines following things

◉ Public packages: list of packages that current module exports using ‘exports‘ keyword
◉ Dependencies on other modules: list of other modules on which the current module is dependent on. This is done using ‘requires‘ keyword 
◉ Services offered: list of services that current module provides using ‘provides‘ keyword
◉ Services consumed: list of services that current module consumes using ‘uses‘ keyword
◉ Reflection permission: permission to specify if refection can be used to access private members using ‘open‘ keyword

Note: Module descriptor file needs to export packages as by default all packages are private. Also, we can not use reflection on other module classes. We need to enable reflection in order to use reflection.

module com.module.util{ // module <module.name>
 exports com.module.util;
 requires java.sql;
 }

Exports

By default all the packages are private and we can make them public using exports keyword

Syntax

exports <packageToExport>;

Example

module com.module.util{
    exports com.module.package1;
    exports com.module.package2;
}

Rules to use export keyword:

◉ only exports packages not classes
◉ each package requires new exports keyword

Qualified export: Exports … To


This exports packages to only specific modules and not to all. It is also known as qualified export.

Syntax

exports <packageToExport> to <comma-separated module to grant access>;

Example

module com.module.util{
    exports com.module.package1;
    exports com.module.package2 to com.module.app;
    exports com.module.package3 to com.module.app, com.module.help;
}

In above case all modules can access com.module.package1, But only com.module.app can access com.module.package2 as well.

Requires

If a module needs to access packages exported from other modules, then these other modules must be imported using ‘requires’ keyword.

Only after specifying the module dependency using ‘requires’, the other module packages can be used.

Syntax

requires <module-to-access>;

Example

module com.module.app{
    requires java.sql;
    requires com.module.util;
}

Rules to use requires keyword:

◉ only module can be specified for ‘requires’. Packages cannot be specified
◉ dependency of each module must be specified separately, with separate ‘requires’ keyword

Requires Static


Sometimes we need some modules during compile time only and they are optional at runtime. For example, testing or code generation libraries.

If we need compile time dependency that is optional at runtime then this dependency must be specified using ‘requires static’ keyword.

Syntax

requires static <module-to-access>;

Example

module com.module.app{
    requires static java.sql;
    requires com.module.util;
}

In this example java.sql is mandatory at compile time but optional at runtime. 

Requires Transitive


There is a possibility to grant access of the modules, on which our current module depends, to the module that uses our current module. The ‘requires transitive’ keyword helps to achieve this.

This means all the modules that are using our module will get the access to transitive dependency automatically.

Syntax

requires transitive <module-to-access>;

Example

module com.module.app{
    requires transitive com.module.util;
    requires java.sql;
}

So all other modules that are using com.module.app module can access the exported packages from com.module.util.

Uses

Using uses keyword we can specify that our module needs or consumes some service. Service is a interface or abstract class. It should not be an implementation class. 

Syntax

uses <service-required>;

Example

module com.module.util{
    uses com.util.PersonDataService;
}

Note: The most important thing to note here is that ‘requires’ adds a module dependency, whereas ‘uses’ specifies required service class. 

Provides … With

We can specify that our module provides some services that other modules can use.

Syntax

provides <service-provided> with <service-implementation-class> ;

Example

module com.module.util{
  provides com.util.PersonDataService with com.util.DbPersonServiceImpl;
 }

Open

Since java 9 encapsulation and security is improved for the reflection apis. Using reflection we were able to access even the private members of the objects.

From java 9 this is not open by default. We can although grant reflection permission to other modules explicitly.

open module com.module.util{
}

In this case all the packages from util module are accessible using reflection. 

Opens


If we do not want to open all the packages for reflection we can specify packages manually using ‘opens’ keyword.

module com.module.util{
    opens com.module.package1;
}

In this case only classes from package1 are accessible using reflection.

Opens … To


Using ‘opens …to’ keyword we can open reflection permission for specific packages to specific modules only.

module com.module.util{
  opens com.module.package1 to module.a, module.b, org.test.integration;
}

In this case only module.a, module.b, org.test.integration modules can access classes from package1 using reflection.

Note: If we need reflection access to the module, we can gain the access using command line option ‘–add-opens’, even if we are not the owner of the module.

Aggregator Module


First of all, this is not a technical concept. It is just a convenience concept for developers to make there life easier.

Sometimes multiple modules require other multiple modules. Instead of adding these in every module descriptor, we can create one module that will add all the required dependency using ‘transitive’. Then we just need to add dependency of this module wherever needed, this will add all the required modules transitive dependency. This common module is the ‘Aggregator module’.

For example, we have 10 modules, modA to modJ. modP, modQ, modR needs all 10 modules, then we can create one common module as below,

module modulePQR{
  requires transitive modA;
  ....
  ...
  requires transitive modJ;
}

Then modules P, Q and R just need to add require for modulePQR

module modP{
  requires transitive modulePQR;
}

The module modulePQR is the Aggregator module.

Fast track reading

  • Java Platform Module System (JPMS) is a part of Jigsaw Project
  • From java 9, jre is converted to multiple small modules and they are present in folder ‘jmods’
  • Module is a group of closely related packages, resources and module descriptor(module-info.java) file
  • Module names must be unique
  • Each module must have exactly one Module Descriptor file with name ‘module-info.java’
  • Packages must be unique. Even in the different modules we cannot have same package
  • 4 Types of Modules: System Modules , Application Modules, Automatic Modules and Unnamed Module
  • Module descriptor file must specify requires modules, exported packages, Services offered, Services Consumed and Reflection permission
  • Exports : By default all the packages are private and we can make them public using exports Keyword
  • Requires : specify the module dependency
  • Only compile time dependency is specified using requires static
  • Requires Transitive: Means all the modules who are using our module will get the access to transitive dependency automatically,
  • Uses: specifies that our module needs or consumes some service
  • Provides … With: specifies that our module provides some services that other modules can use
  • Open reflection permission to other modules explicitly
  • Aggregator Module:- module which will add all the required dependencies using transitive

Friday, March 12, 2021

Immutable Mutable Objects

Oracle Java Exam Prep, Oracle Java Certification, Oracle Java Preparation, Core Java

There are some strong reasons why we may want to make genuinely immutable objects. Then there are various frameworks which operate on mutable objects, thus preventing us from using an immutable object pattern. Perhaps we even have a situation where a particular class needs to be mutable, but some of its objects need to be preserved immutably.

We want to avoid the side effects of mutability, which boil down to:

◉ thread leakage

◉ general state degradation of centrally managed objects

◉ unexpected bugs

The options are:

◉ robustly have immutable objects

◉ add a clone function to the object so it can be safely copied for situations where a central copy risks being changed

◉ the thing I’m about to tell you

Looking at having immutable objects for a moment, it seems like it’s a solid enough pattern if you can use it. It’s mistake proof and it does the job. But it’s also a sledgehammer, perhaps even requiring extra code to copy and mutate when something changes.

The clone pattern is great unless someone forgets to use it. Similarly, there’s fluent setters that do copy-on-write and return a new copy, but they don’t work if someone forgets that they don’t mutate the original. These techniques are good, and they’re flawed. Of the pair, the clone is the weakest, as it sort of makes immutability optional, even when it should be mandatory.

The Read-only View

Let’s imagine a simple POJO:

public class Author {

   private String name;

   private int booksPublished;

   private Author[] collaborators;

   public String getName() {

       return name;

   }

   public void setName(String name) {

       this.name = name;

   }

   ... etc

}

The properties of the object may be mutable because we’re either using a serialization framework that uses the getters/setters to do its job, or, shock/horror, the values need to be mutable sometimes. Perhaps something will update the number of books this author has published from time to time.

However, if we had a big list of authors that was being shared around the system, we don’t want something consuming that list being able to change the name or other properties of an author they’re only supposed to be looking at.

Cloning huge collections of data over and over again for processing totally wastes time and memory

We feel this the most, and even get SpotBugs/FindBugs reports, when we return a known mutable object from a getter. For example:

public Author[] getCollaborators() {
   return collaborators;
}
 
// some calling code now can modify the
// internal state of the object!!!
thatAuthor.getCollaborators()[0] = null;

One nice way to provide the outside world with a read-only insight into the contents of mutable collection is to use the Stream API:

public Stream<Author> getCollaboratorStream() {
    return Arrays.stream(collaborators);
}

This prevents the caller using a mutable view of the internals.

Let’s Extend To Completely Immutable Views


While my object may itself be immutable, what if its class provided a readonly view as an interface:

interface AuthorReadOnly {
   String getName();
   int getBooksPublished();
   Stream<AuthorReadOnly> getCollaboratorsStream();
}

It would be very easy for our actual POJO to inherit and implement these methods. In fact, the native getters are probably already overrides of these. Any innately mutable object returned could either be returned via its own read-only interface, or returned as a Stream or both.

The beauty of this is that it’s a type trick. There’s very little runtime code to worry about. It’s just a question of how the original object is exposed from a mutable place to an immutable place.

It may help get the best of both worlds sometime.

Wednesday, March 10, 2021

Handling Cross-Site Scripting (XSS) in Java

Cross-site scripting (XSS) is a type of security vulnerability in web applications where an attacker injects malicious scripts through some kind of user input (like input boxes, URL parameters, HTML headers, etc)

It is important to prevent XSS attacks to safeguard the confidentiality, integrity, and availability of the information of the web application. The two main cross-site scripting flaws are reflected and stored:

Reflected XSS

Malicious content from a user request is displayed to the user or it is written into the page after from server response. For instance, in the next screenshot, the credit card number field is vulnerable. After the number, there is a script to be injected:

<script src="data:text/javascript;base64,YWxlcnQoJ215IGphdmFzY3JpcHQgaGVyZScp" defer=""></script> 

Oracle Java Tutorial and Material, Oracle Java Certification, Oracle Java Preparation, Oracle Java Prep

When the purchase button is clicked, the alert windows is displayed:

Oracle Java Tutorial and Material, Oracle Java Certification, Oracle Java Preparation, Oracle Java Prep

A patch to the flaw in Java


When you have a String RequestParam, avoid handling it without sanitization:

Oracle Java Tutorial and Material, Oracle Java Certification, Oracle Java Preparation, Oracle Java Prep

The OWASP Java encoder has a method called forHtml for that purpose:

Oracle Java Tutorial and Material, Oracle Java Certification, Oracle Java Preparation, Oracle Java Prep

Stored XSS


The payload is persisted. For example, in the next screenshot, you can see that a script is added as a comment. When the page is loaded the script is executed and printed as part of the code.

Oracle Java Tutorial and Material, Oracle Java Certification, Oracle Java Preparation, Oracle Java Prep

A patch to the flaw in Java


The solution is to sanitize the RequestBody before handling it:

Oracle Java Tutorial and Material, Oracle Java Certification, Oracle Java Preparation, Oracle Java Prep

Now, the comment is printed as text, but it is not executed:

Oracle Java Tutorial and Material, Oracle Java Certification, Oracle Java Preparation, Oracle Java Prep

Source: javacodegeeks.com

Monday, March 8, 2021

Sorting ArrayList in Reverse or Descending Order in Java 8

Oracle Java Exam Prep, Oracle Java Tutorial and Material, Oracle Java Preparation, Oracle Java 8

A quick guide on how to sort the arraylist in descending order or reverse order in java and example programs using Collections.reverseOrder() method.

1. Overview

In this article, We will learn how to sort ArrayList in descending order in java. Sometimes this is referred as collections reverse or decreasing order.

To get the list in the reverse order, we need to use Collections.reverseOrder() and Collections.sort() methods together.

2.  Sort ArrayList In Descending order using Collections.reverseOrder()

In the below examples, we are using the built-in comparator from the reverseOrder() method and passing it to the Collections.sort() method.

package com.oraclejavacertified.java8.arraylist;

import java.util.ArrayList;

import java.util.Collections;

import java.util.Comparator;

import java.util.List;

public class ArrayListReverseOrder1 {

    public static void main(String[] args) {

        // Creating ArrayList

        List<Integer> numbersList = new ArrayList<>();

        // Adding values to List

        numbersList.add(150);

        numbersList.add(50);

        numbersList.add(250);

        numbersList.add(500);

        numbersList.add(350);

        // printing before sorting

        System.out.println("Before sorting : " + numbersList);

        // Getting the descending order comparator

        Comparator<Integer> reverseComparator = Collections.reverseOrder();

        // Sorting with the reverse comparator with sort() method.

        // sort() method internally uses this comparator to sort in the descending order

        Collections.sort(numbersList, reverseComparator);

        // printing the final list after reverse order sorting. Original list only

        // sorted.

        System.out.println("After sorting : " + numbersList);

    }

}

Output:

Before sorting : [150, 50, 250, 500, 350]
After sorting : [500, 350, 250, 150, 50]

3.  Sort ArrayList In Descending order using Collections.reverse()


Next, look at the another way to sort the arraylist in descending order using two methods as below.

Collections.sort(arraylist); –> first sorts the list in the ascending order

Collections.reverse(arraylist); –> Next, reverse the sorted list.

Example:

import java.util.ArrayList;
import java.util.Collections;
import java.util.List;
 
public class ArrayListReverseOrder2 {
 
    public static void main(String[] args) {
 
        // Creating ArrayList
        List<Integer> numbersList = new ArrayList<>();
 
        // Adding values to List
        numbersList.add(150);
        numbersList.add(50);
        numbersList.add(250);
        numbersList.add(500);
        numbersList.add(350);
 
        // printing before sorting
        System.out.println("Before sorting : " + numbersList);
 
        // sorting the list in the ascending order
        Collections.sort(numbersList);
 
        // reversing the sorted list into descending order
        Collections.reverse(numbersList);
 
        // printing the final list after reverse order sorting. Original list only
        // sorted.
        System.out.println("After sorting : " + numbersList);
 
    }
 
}

This program also produces the same output as in the section 2.

4. Java 8 Sort ArrayList Descending Order


Sorting list in reverse order is pretty easy from stream.sorted(Collections.reverseOrder()) in java 8 api.

We can use parallelStream() method to work efficiently with larger data volumes.

import java.util.ArrayList;
import java.util.Collections;
import java.util.List;
import java.util.stream.Collectors;
 
public class ArrayListReverseOrder2 {
 
    public static void main(String[] args) {
 
        // Creating ArrayList
        List<Integer> numbersList = new ArrayList<>();
 
        // Adding values to List
        numbersList.add(150);
        numbersList.add(50);
        numbersList.add(250);
        numbersList.add(500);
        numbersList.add(350);
 
        // printing before sorting
        System.out.println("Before sorting : " + numbersList);
 
        List<Integer> descendingList = numbersList.stream()
                .sorted(Collections.reverseOrder())
                .collect(Collectors.toList());
 
        // printing the final list after reverse order sorting. Original list only
        // sorted.
        System.out.println("After sorting : " + descendingList);
    }
}

Friday, March 5, 2021

Java String Programs – Programming Examples for Interviews (2021)

Java String Programs, Oracle Java Tutorial and Material, Oracle Java Prep, Core Prep, Oracle Java Certification

A quick guide to java string based interview programming questions and examples.

1. Overview

In this post, We will see what are the String programs frequently asked in the java interviews.

All may be asked in the face to face or telephonic technical rounds. Every java programmer must know all of these questions.

Some of these will be tricky but easy if you understand clearly.

2. Java String Programs

Next, Look at the java string based programs with example codes.

2.1 How to split the string with a delimiter

public class StringSplitExample1 {

    public static void main(String[] args) {

        String str = "java@program@to.com";

        String[] splitArray = str.split("@");

        for(String value : splitArray){

            System.out.println(value);

        }

    }

}

2.2 How to get codepoints for a String?

String str = "Code Points as Stream";

System.out.println("Input string value : "+str);

IntStream intStream = str.codePoints();

System.out.println("Printing each char from string as ASCII value");

intStream.forEach(value -> System.out.print(value+" "));

Output:

Input string value : Code Points as Stream

Printing each char from string as ASCII value

67 111 100 101 32 80 111 105 110 116 115 32 97 115 32 83 116 114 101 97 109

2.3 How to remove the Zero’s from String?

String str = "Digit ZERO 0 is not considered in input name. So removing all Zero's 00000000";
IntStream intStream = str.codePoints();
 
String zeroRemovedString = intStream.filter(ch -> ch != 48)
         .collect(StringBuilder::new, StringBuilder::appendCodePoint, StringBuilder::append)
         .toString();

Output:

Digit ZERO  is not considered in input name. So removing all Zero's

2.4 How to check the string is palindrome or not?

public class StringPalindromeAppend {
 
    public static void main(String[] args) {
         
        String input1 = "civic";
         
        StringBuffer buffer = new StringBuffer();
 
        for (int i = input1.length() - 1; i >= 0; i--) {
            buffer.append(input.charAt(i));
        }
         
        String reversedString1 = buffer.toString();
 
        if (input1.equals(reversedString1)) {
            System.out.println(input1 + " is a palindrome");
        } else {
            System.out.println(input1 + " is not a palindrome");
        }
 
    }
}

2.5 How to check the String Palindrome recursively ?

public static boolean isPalindrome(String s) {
 
    // if the string has one or zero characters then recursive call is stopped.
    if (s.length() == 0 || s.length() == 1)
        return true;
 
    // checking the first and last character of the string. if equals then call the
    // same function with substring from index 1 to length -1. Because substring
    // excludes the endIndex.
    // if these two values are not same then string is not Palindrome so this
    // returns false.
    if (s.charAt(0) == s.charAt(s.length() - 1))
        return isPalindrome(s.substring(1, s.length() - 1));
 
    // this statment is executed if and if only first and last character of string
    // at any time is not equal.
    return false;
}

2.6 How to count vowels and consonants for String ?

String input = "This is using Collectors api methods !!!!";
 
List<Character> vowels = new ArrayList<>(Arrays.asList('a', 'e', 'i', 'o', 'u'));
input = input.toLowerCase();
 
IntStream stream = input.chars();
 
Map<Boolean, Long> finalResultMap = stream.mapToObj(ch -> (char) ch).filter(ch -> (ch >= 'a' && ch <= 'z'))
        .collect(Collectors.partitioningBy(ch -> vowels.contains(ch), Collectors.counting()));
 
System.out.println("Total count of vowels : " + finalResultMap.get(new Boolean(true)));
System.out.println("Total count of consonants : " + finalResultMap.get(new Boolean(false)));

Output:

Total count of vowels : 11
Total count of consonants : 20

2.7 How to compare different String objects with != operator ?

String status = new String("Failure");
 
if (status.intern() != "Failure") {
    System.out.println("Valid age");
} else {
    System.out.println("Invalid age");
}

Use intern() method to get the original string from String constant pool for string contents comparision with != operator.

Understand != operator with Strings

2.8 How to find the first non repeated character from String ?

public static String firstNonRepeatedCharacterJava8(String input) {
 
  Map chars = input.codePoints().mapToObj(cp -> cp)
    .collect(Collectors.groupingBy(Function.identity(), LinkedHashMap::new, Collectors.counting()));
 
  int pos = chars.entrySet().stream().filter(e -> e.getValue() == 1L).findFirst().map(Map.Entry::getKey)
    .orElse(Integer.valueOf(Character.MIN_VALUE));
 
  return String.valueOf(Character.toChars(pos));
 }

2.9 How to convert String to Date in java 8?

String isoDateInString = "May 30, 2020";
 
DateTimeFormatter customFormatter = DateTimeFormatter.ofPattern("MMM d, yyyy");
 
LocalDate date = LocalDate.parse(isoDateInString, customFormatter);
 
System.out.println("Locale Date : "+date); // 2020-05-30

2.10 How to convert String to Int ?

Conversion from String to integer can be done using following techniques.

◉ Integer.parseInt()
◉ Integer.valueOf()
◉ Integer Constructor
◉ DecimalFormat

2.11 How to check String contains only digits ?

public boolean checkStringOnlyDigitsIsDigit(String input) {
 
 IntStream intStream = input.chars();
 boolean isMatched = intStream.anyMatch(ch -> Character.isDigit(ch));
 
 return isMatched;
 
}

2.12 How to reverse the words in String?

public String reverseWordsWithStringBuilder(String input) {
 
  // step 1: converting input string into stream.
  Stream-<String-> stream = pattern.splitAsStream(input);
 
  // step 2: reversing each word.
  Stream->StringBuilder-> intermeidateOutput = stream.map(word -> new StringBuilder(word).reverse());
 
  // step 3: merging all reversed words with empty space " "
  String reversedInput = intermeidateOutput.collect(Collectors.joining(" "));
 
  return reversedInput;
 }

Wednesday, March 3, 2021

Automate Technical Documentation using Jamal

Introduction

Writing good technical documentation is an art.

An art is the expression or application of human creative skill and imagination, … to be appreciated primarily for their beauty or emotional power.

But every art, like sculpting, has a craft part. You need chisels, hammers to form the sculpture out of the blob of marble. You need to learn the craft to master the art. Technical documentation writing is similar.

Writing sentences that are easy to read, entertaining for the reader is the art part. Fixing typos and grammatical errors is more like a craft. Making the documentation precise, to the point, and well structured is also the craft part. Crafts can be learned and aided with the right tool.

In technical documentation writing, the tools help address those tasks that are often performed manually though they could be automated. In this article, I will write about a tool that helps in that manner and which I used successfully to write documentation, many articles — also this one –and books.

What can be automated

Many things can be automated for technical document writing. I tried to gather a list from my experience, but it may not be complete. The list is the following:

Oracle Java Exam, Oracle Java Preparation, Oracle Java Certification, Oracle Java Career, Core Java, Oracle Java Exam Prep

◉ Eliminate manual text repetition.
◉ Transclude information from the documented system.
◉ Checks internal consistency of the documentation.
◉ Check the consistency of the documentation with the documented system.

In the following, I will talk shortly about these tasks, and then I will explain the tool that I use to address these.

DRY in Documentation


The DRY (Don’t Repeat Yourself) is a fundamental and old principle in programming. If there are the same lines in the source, they should be singled out, moving the common code into a separate method, class, or other coding structure. Copy/Paste programming is evil and must not be done. It does not mean that there is no repeated code in the compiled binary code. Code generators are free to repeat code if they think that is better than in some way eliminating it. One famous example is when a short loop is extended, and the code is repeated instead of creating a binary looping construct. It may consume more memory, but at the same time, optimization may find it faster.

The same should happen when you write the documentation. Except, you do not have methods or classes in the documents. You can reorganize your document into smaller sections, and then you can refer to the areas. It may have an impact on the readability. If the reader has to turn the pages instead of linear reading, comprehending the document becomes challenging. Using non-printed, non-linear documentation, a.k.a. hypertext eases a bit the page-turning, but the reader still can get mentally lost in the maze of the non-linear documentation. The ideal solution would be to have documentation, which is linear and contains all the interesting text for the particular user, reading it in the order as they want to read it.

Eventually, it is impossible. With today’s technology, you cannot create a document that contains precisely what the reader wants to read at the very moment and changes for each reader and even for each reading. The best approach we have is repeating some of the text in the documentation. Some readers may find it boring, while others will just get what they need. Your document “source” should be DRY, and the repeating of the text, the copy-paste operation has to be automated. The advantage is: any change in the text is consistently propagated to every occurrence of the text.

Information Transclusion


A living document has to follow the change of the system it documents. In the case of software, this can partially be automated. A lot of data that may need to be included in the document is available in the source code. For example, the current version of the application, a numeric value, may be included in the documentation at different locations. Updating it to the latest version manually is almost always some error. Sooner or later, one or more references may skip the update and become stale. The solution is partial when we use the technique that eliminates DRY. We define the version in the document in one place, and it will be referred to in other places. It still needs that one place to be updated. Fetching the version number from the source code automatically is one level more automation.

Usage samples are also an excellent example for transclusion. When the usage samples are automatically fetched from the unit tests, they are guaranteed to run during the test execution.

Internal Consistency


Ensuring internal consistency of the document can also be automated to some level. It is such an essential factor that many documentation systems support it related to cross-references. The examples can be various.

You may create a document with use cases. In the use cases, you use actors in the description. A document management system can ensure that all the actors used in the document are also defined. A similar check can be done for abbreviations and other things. Consistency, if it can be formally defined, can be checked by automated tools.

External Consistency


Just as well as the different parts of the document should be consistent and without contradiction, the documentation should also be consistent with the system it documents. It is similar to transcluding information from the source. The difference is that the information, in this case, is mainly existence only. For example, you reference a file, a directory, a method in a Java class. A tool can check that the directory, file, or method exists; it was not renamed nor deleted. Similarly, other consistency checks can be programmed.

Document Writing is Programming


There may be some other cases where some automation may come into the picture. The general approach, however, should be to manage the document similar to the program source. Technical documents need maintenance. Documents have a source, and they should be structured. One change in the documented system should be followed by a single change in the document. Every other occurrence in the output should be created automatically.

It is very much similar to programming. The programmers write source code in a high-level programming language, and the compiler generates the machine code. Sometimes the compilation process is a long chain involving many tools. Programming in machine code is an art of the past. The advantages of using a high-level language fairly compensate for the extra effort using the compiler chain.

In technical documentation, the advantages, at least in the short run, are not so appealing. Creating a document using some WYSIWYG editor is easy as opposed to programming in assembly. It is easy to lure the technical writer to avoid some extra work at the start and avoid the document source code creation.

A work to be done tomorrow is always cheaper today than the avoidable work of now.

The same will not be true tomorrow. Creating the more complex but less redundant documentation source almost always payback, especially if we consider document quality coming from consistency and up-to-date-ness.

Oracle Java Exam, Oracle Java Preparation, Oracle Java Certification, Oracle Java Career, Core Java, Oracle Java Exam Prep

The Tool: Java Macro Language


In the rest of this article, I will describe a tool that can automate document management tasks. The tool is the Java version of the text processor Jamal. Originally the name was standing for Just Another Macro Language, and it was created in the late 1990-ies in Perl. A few years ago, I rewrote the implementation in Java, with the original functionality enhanced. Since the application is based on Java, it is now named Java Macro Language, abbreviated as Jamal.

The basic concept of Jamal is that the input text containing free text and macros mixed is processed. The output is a text with all the macros executed and evaluated. The syntax of the macros is free. The only requirement is that each of them starts and ends with a specific string. The start and end string can be defined when the macro processor is initialized. It can also be changed on the fly in the input text. When I document Java programs, then I usually use {% as start string and %} as end string. That way, a simple macro definition will be

{%@define lastUpdated=2021-02-17 16:00%}

Later you can refer to this macro as

{%lastUpdated%}

and it will be replaced by the value 2021-02-17 16:00 for each use.

Jamal distinguishes user-defined and built-in macros. The example above, named lastUpdated is a user-defined macro, as it is defined in the input text. The macro defining it, named define is built-in. It is implemented as a Java class implementing the Jamal Macro interface. The built-in, Java implemented macros are provided in JAR files, in libraries. The core package contains the essential macros, like define, import, begin, end, options, comment, and a few others. These macros are not task-specific. They are needed generally.

Other libraries, like the jamal-snippet library, contain macros that support some specific task. The mentioned jamal-snippet library supports document management.

Snippet Handling, Transclude


The original idea of the snippets is not new. The basic approach to use the source code as part of the documentation originates from D. Knuth with Web and Tangle as early as 1984. https://en.wikipedia.org/wiki/CWEB Creating a program that contains the documentation and the execution code did not become popular as it needed a lot of extra work from the developers and an additional compilation step. The current trend includes the documentation into the source code as a comment. In the case of Java programs, this is JavaDoc. It is also a trend to use unit tests as a form of documentation.

The two are separate, and both lack the aspect that the other provides. JavaDoc does not show sample use unless someone copies some sample code into it manually. The unit test does not contain a proper explanation unless someone copies fragments or the whole from the JavaDoc to the unit test comments. JavaDoc is converted to navigable HTML pages. Unit tests are source code. Although the best documentation is the source code, it would be nice to have a better, more document-like format.

When we talk about snippets, then we copy code fragments automatically into the documentation. In practice, the documentation format is Asciidoc or MarkDown these days. Both formats allow code samples in the document.

using Jamal, the snippets can be marked in the Java source code or any other source code with

snippet snippetName
    end snippet

lines. The snippetName should be replaced by a unique name that identifies the snippet, and all the lines between the snippet and end snippet lines will be the snippet itself. The snippets are gathered using the {%@snip:collect directory%} macro. Here directory is either a directory or a single file. The collection process reads each file and collects the snippets. After this the snippets can be referenced using the {%@snip snippetName%} macro. When Jamal runs, the macro is replaced with the actual value of the snippet. It ensures that the code sample in the documentation is up-to-date.

Other macros can trim the content, replace some strings in the samples, number the lines, skip some lines, and so on. With these, you can include any code sample.

Snippets are suitable for code samples, but not only for code samples. As JavaDoc is included in the source code, some parts of the documentation can also be included in the code as comments.

For example, the implementation of the macro directory contains the following lines:

// snippet dirMacroFormatPlaceholders
    "$name", name, // gives the name of the directory as was specified on the macro
    "$absolutePath", dir.getAbsolutePath(), // gives the name of the directory as was specified on the macro
    "$parent", dir.getParent() // the parent directory
).and(
    "$canonicalPath", dir::getCanonicalPath // the canonical path
    //end snippet

These lines list the different placeholders and their values that the built-in template handler knows. The documentation includes this snippet with the following lines:

{%@define replace=|^.*?"(.*?)"|* `$1`!|!.*?//||%}
{%@define pattern=\)\.and\(%}
{%#replaceLines{%#killLines{%@snip dirMacroFormatPlaceholders %}%}%}

(Note: the actual version is a bit more complicated, as you will see later.) It inserts the content of the snippet evaluating the snip macro. The content of the sippet is then passed to the macro killLines. This macro will delete all the lines that match the regular expression defined in the macro pattern. The result is still further modified by the replaceLines macro. It executes the Java String replaceAll() method on each line with the arguments defined in the macro replace. The final result, inserted into the output is:

* `$name` gives the name of the file as was specified on the macro
* `$absolutePath` the absolute path to the file
* `$parent` the parent directory where the file is
* `$canonicalPath` the canonical path

This way, the document is much easier to maintain. The documentation of the parameters is along with the code, and that way, it is harder to forget to update the documentation. Also, the name of the placeholder is taken directly from the source code. Even if the developer makes a typo naming the placeholder in the example above, the documentation will contain the name as it is in the code and the characters it has to be used.

Snippets can come from other sources, not only from file snippet fragments. The built-in macro snip:xml reads a while XML file and assigns it to a macro name. This macro is similar to the built-in core macro define. It also defines a user-defined macro. In this case, however, the macro is not a constant string with argument placeholders as those defined, calling the macro define. In this case, the content is a whole parsed XML file, and the one argument the macro can and should have when invoked must be an XPath. As you can guess, the result of the macro call is the value in the XML found by the XPath.

As an example, the module documentation README.adoc.jam for jamal-plantuml contains the following lines close to the start of the file:

{%@snip:xml pom=pom.xml%}\
{%#define PLANTUML_VERSION={%pom /project/dependencies/dependency/artifactId[text()="plantuml"]/following-sibling::version/text()%}%}\
{%#define VERSION={%pom /project/version/text()%}%}\

It reads the pom.xml file of the macro and defines the PLANTUML_VERSION and VERSION macros to hold the current version of the used PlantUml library and the version of the project, respectively. Later in the documentation, both {%PLANTUML_VERSION%} and {%VERSION%} can be used and will be replaced in the output with the up-to-date version.

We have seen that snippet texts can be fetched from arbitrary source files and XML files. In addition to that, snippets can also be defined in .properties files (even XML format properties file) and can also be defined as a macro. The snippet definition as a macro using the snip:define built-in has a particular use that we will discuss later with the snip:update macro.

File, Directory, Class, Method => Consistency


The macros file, directory, java:class, and java:method are macros that can keep the code consistent with the system. These macros add barely any formatting to the output; therefore, their use needs discipline. They check that the argument file, directory, class, or method exists. If the entity does not exist, then the macro throws an exception. If the entity was renamed, moved, or deleted, the documentation has to be updated, or else it does not compile.

The use of the macros file and directory is straightforward. They check the existence of the file and directory specified as the argument. The name can either be absolute or relative to the input document.

Checking the existence of a class or method is not that straightforward. It needs a Java environment that has the class on the classpath. It is recommended to invoke Jamal from a unit test to convert the document from the input to output. This article is also written using Jamal as a preprocessor, and it is converted from a unit test of the module jamal-snippet using the following code:

private static void generateDoc(final String directory, final String fileName, final String ext) throws Exception {
    final var in = FileTools.getInput(directory + "/" + fileName + "." + ext + ".jam");
    final var processor = new Processor("{%", "%}");
    final var result = processor.process(in);
    FileTools.writeFileContent(directory + "/" + fileName + "." + ext, result);
}
 
@Test
void convertSnippetArticle() throws Exception {
    generateDoc(".", "ARTICLE", "wp");
}

During the unit test’s execution, the classes of the documented system are on the classpath or on the module path, and that way, these macros, java:class and java:method work.

Updating the Input


The jamal-snippet library has a particular macro, snip:update, which does something exceptional.

Built-in macro implementations get the part of the input, which is between the opening and closing string. It is the part of the input that they are supposed to work on. What they get is the input object containing not only the character but also a position coordinate. This coordinate contains the file name and the line/column position of the input in the file. Some macros use this coordinate to report the position of some error. Other macros, like include or import, use the file name to calculate the imported or included file path relative to the one that contains the macro.

The macro snip:update uses the file name to access the file and modify it physically. The macro scans the file and looks for lines that look like

{%@snip id
   ...
%}

When the lines with that pattern are found, then the lines between the first and last line, practically the lines denoted with ... above, are replaced with the snippet’s actual content. It will help the maintenance of the input document. When you write the document, it is easier to see the actual snippet and not only the reference to the snippet. It is also easier to debug the line killing, character replacement, and other snippet formatting transformations.

The macro snip is not disturbed by these lines. The syntax of the snip macro is like snip id ... anything treated as a comment... to allow this particular use case.

The invocation of the macro updating of the input should occur at the end of the document when all snippets are already defined. It is also essential to save the input to the version control before converting. The use of this possibility makes it possible to include into the document the formatted snippets. It is done, for example, in the documentation of the macro directory. The sample presented before was a simplified one. Here you can see the real one making use of updates.

{%#snip:define dirMacroFormatPlaceholdersFormatted=
{%#replaceLines{%#killLines{%@snip dirMacroFormatPlaceholders %}%}%}%}
 
{%@snip dirMacroFormatPlaceholdersFormatted
* `$name` gives the name of the directory as was specified on the macro
* `$absolutePath` gives the name of the directory as was specified on the macro
* `$parent` the parent directory
* `$canonicalPath` the canonical path
%}

This structure includes the snippet dirMacroFormatPlaceholders and converts enclosing it into macros killLines and replaceLines. The final formatted result, however, does not get directly into the output. It is assigned to a new snippet using the macro snip:define. The name of the new snippet is dirMacroFormatPlaceholdersFormatted.

After this, when this new, already formatted snippet is defined, it is referenced using the snip macro to be included in the output. When the macro snip:update is used at the end of the file, this second use of the snip macro is updated, and the formatted lines are inserted there, as you can see.

The first use of the macro snip is not updated because there are extra characters before using the macro. Also, there are extra characters after the snippet identifier.

Creating Diagrams


Using diagrams are very important in the documentation. As the saying goes, a picture is worth a thousand words, especially if your readers are non-native and do not even know a thousand words. An excellent tool to create diagrams is PlantUml. The source for the diagrams in this tool is a text that describes the UML diagram structurally. A simple sequence diagram can look like the following:

@startuml
Aladdin -> Jasmine : I love you
Jasmine -> Rajah : Aladdin loves me
Rajah --> Aladdin : wtf buddy?
@enduml

sample.svg

Putting this text into the macro

{%@plantuml sample.svg
Aladdin -> Jasmine : I love you
Jasmine -> Rajah : Aladdin loves me
Rajah --> Aladdin : wtf buddy?
%}

will create the image, and it can then be referenced in the document to get

Oracle Java Exam, Oracle Java Preparation, Oracle Java Certification, Oracle Java Career, Core Java, Oracle Java Exam Prep

PlantUml is a widely used tool, and it has integration with many document processors. That way, it is integrated with Markdown and Asciidoc as well. Using Jamal as a preprocessor instead of the PlantUml direct integration has a few advantages, however.

You do not need to have the integration for PlantUml installed on the environment where the document rendering executes. You do not have it, for example, on GitHub or GitLab. Using Jamal, the PlantUml processing is done in your local environment, and after that, you just have a standard Markdown, Asciidoc, or whatever format you use. For example, this document uses WordPress markup, which does not have PlantUml integration, but it does not matter. The source named ARTICLE.wp.jam is processed by Jamal generating ARTICLE.wp, and it has everything it needs. Pictures are generated.

The Jamal preprocessing has other advantages. In this article, as an example, the text of the UML diagram appears three times. Once when I display for the example of how a UML digram is defined in PlantUml. The second time when I show how it is integrated using a Jamal macro. The third time it appears as an image.

The source input contains it only once before the first use. The user-defined macro, named alilove, contains the actual UML, and the latter only references this macro to get the same text. If there is a need to update the structure, it must be done only in one place.

Another advantage is that the macros can access the running Java environment. It is already used when we check the existence and the naming of specific classes and methods. I also plan to extend the PlantUml integration with macros that can leverage the Java environment when we document our code. Running the conversion of the Jamal input during the unit tests reflection can get access to the classes. Using those, I plan to develop macros that need only the listing of the classes you want to be shown on a class diagram. The macro will discover all the relations between the classes and create a UML source to be converted to a diagram using PlantUml. Should your class structure change, the diagrams will also change automatically.